Every year, the University of West Florida (UWF) College of Business hands out a free t-shirt to students at different campus events throughout the year. For the 2023-2024 school year’s design, the College of Business (COB) reached out to me as the President of the UWF branch of the American Marketing Association (AMA) to see if any students would be interested in submitting potential designs.
While this would be a great opportunity for students to get high-impact practice, the summer was already well under way. Like most student organizations, the AMA was not active during the summer months. Instead of bothering students during their well-earned summer breaks, we decided that I could draft up the design so the final mock-up would be complete in time to get shirts printed before the Fall semester.
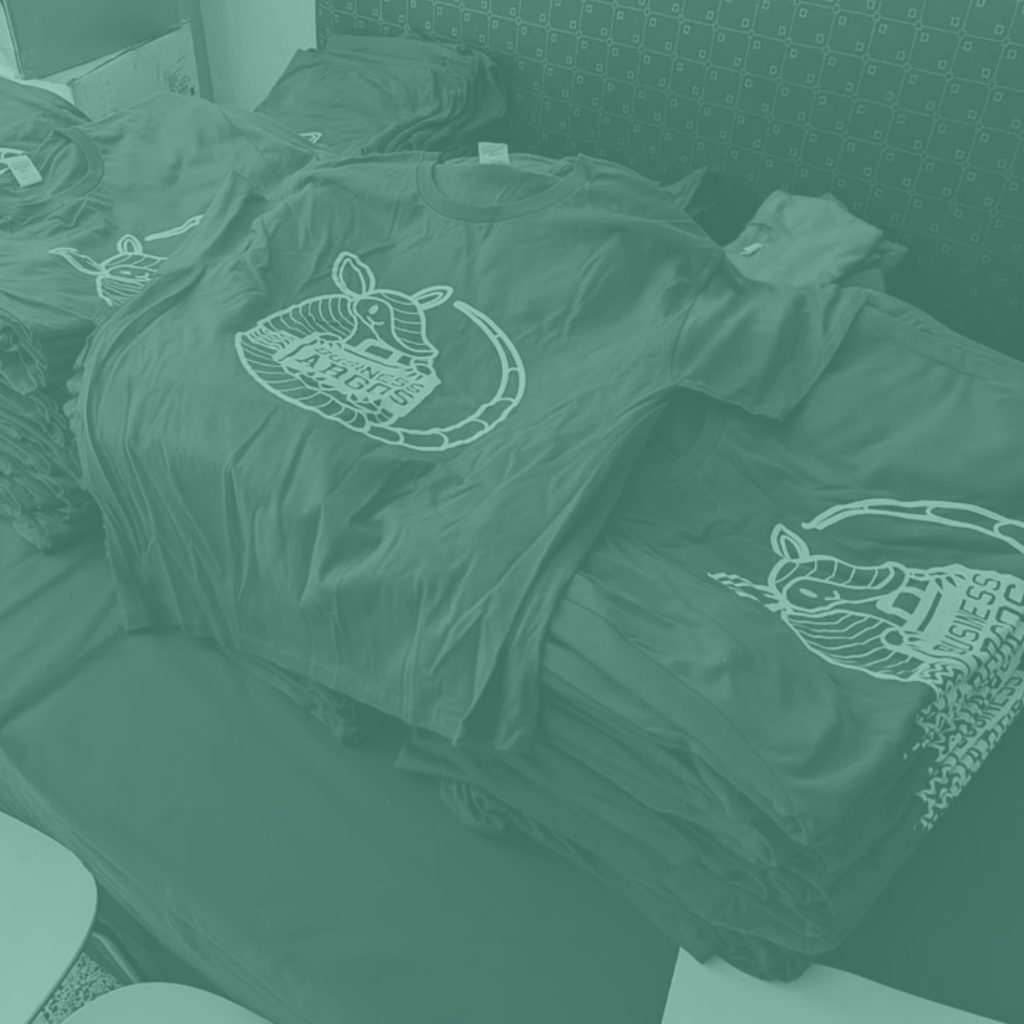
This process resulted in one of my proudest designs to date and I am so excited to see students wearing the shirt my final year at UWF. It feels like a fitting beginning to the end as I wrap up my undergraduate degree in the upcoming months. While this was a great opportunity for me, I regret that time constraints made it so my members weren’t able to get this experience.
While this doesn’t make up for the missed opportunity, I hope that outlining my design process can help students interested in graphic design develop their own processes. By seeing my sketching process, the transfer to digital, and modifications in response to client demands, designers may be able to use my notes as a starting point for developing their own design process with their own future clients.
The Sketching Process
When first laying out the idea of a concept, nothing quite compares to the classic paper and pen. However, you can’t put pen to paper until you know what the client wants. The first step of my sketching process is a meeting where I ask questions about what the client expects from the design.
Some clients may know exactly what they want. Others may know a general concept, but don’t know the specifics. That is why the first question I start with when talking with clients is, “What is the goal of this design?” By starting with this question, I can know their intentions and use my expertise to guide them towards design aspects that help them achieve their ultimate goal.
With the COB administrators, their goal was to create a shirt design that students would choose to wear. By making a design students would like, they would be more likely to grab and wear a shirt, thus advertising the COB around campus and beyond.
Once I had these notes, it was time to go to the drawing board. I began sketching ideas with different graphics associated with UWF – a nautilus shell, an argonaut, and the famous ArgoDillo. However, due to the nature of this project, there was some red tape I could not cross, let alone cut through. Certain symbols are only allowed to be used by certain organizations, such as the President’s Office or the Athletics Department.
Due to these constrictions, I could not work with the nautilus or argonaut figures. However, every problem has a creative solution. While I could not use an argonaut, I could use an argonaut’s boat. Additionally, while I couldn’t use the ArgoDillo, I could use a regular armadillo. These two graphic elements found their way into my pencil sketches.


Once I had my sketches, I sent photos to my clients to get their opinions. The reason I draw my sketches out in pencil before making graphic designs is because it is much easier to erase a pencil line than it is to readjust pen lines in Adobe Illustrator.
Of the designs, the general consensus was the second design was the most popular. Once the design concept has been approved, the process of transferring from physical paper to a digital canvas begins.
Physical to Digital
For my process, I take a photo of the sketch in my sketchbook and upload the photo to my computer. From there, I place the image in Adobe Illustrator on a 10 inch by 10 inch canvas – the typical dimensions for a front-facing t-shirt design. In order to redraw the design using the pen tool, I make the image from my sketchbook translucent and lock the layer before creating my pen layer so that I always have my base sketch just visible enough.
Because this design has a circular shape, I first started by creating a layer with a circle. By placing a perfect circle over my imperfect sketch, it gave me a guideline upon which to fit my critter inside. I adjusted the sketch layer as I drew the armadillo so that the shape of the final design would be a perfect circle.

The first draft was adorable but had much room for improvement. First, it was difficult to tell where the briefcase ended and his body began. Secondly, the glasses – while adorable – were hard to contrast against the other lines of the design. While I did much experimentation to try and keep the glasses, it was ultimately best to remove them altogether.

This second design was much stronger as the briefcase now stood clearly from the rest of the body. Additionally, the removal of the glasses made the rest of the head easier to discern from the body. With this design completed, I sent it to the COB team to get their approval.
Final Modifications
As with any client, there will always be a review process where they will want something else changed. In this case, they wanted detailing on the shell of the armadillo.
While this seems like an easy request, I found it rather difficult to develop a compelling shell pattern that didn’t distract from the design. Here are the renditions that I had created.


After submitting these designs, a new representative from the COB reached out to me – a fellow graphic designer. The email chain had been forwarded her way for her to review the final design and she was asking for access to my Adobe Illustrator file for edits of her own.
Some may think that this is an offensive request. However, the most important thing about any client project is collaboration. If she felt she could help me with designing a compelling shell pattern, then I would gladly take the aid.
And aid she did! Her final design was similar to one of mine featuring the thin lines with wide spacing. She extended the small, squiggly side of the armadillo and changed the wavy pattern to a similar design that better contrasted against the rest of the body.
In the end, the final t-shirt design came out better than I could have ever dreamed. The opportunity to design my own t-shirt and see other students wear my design is one I will not be quick to forget. I cannot wait to see my design flaunted all over campus by students and staff alike and plan to wear the shirt with my graduation photos this upcoming Spring.

